
How to record screen and camera on Mac
Use QuickTime Player to record the screen.
1. Open QuickTime Player and select New Screen Recording in the menu bar.
2. Select the area you want to record. You can also change recording parameters, such as recording microphone sound in the control panel below and clicking the record button.
3. When the recording is complete, click the stop recording button on the top status bar to save the recording file.
Although it is simple to use QuickTime Player to record the screen, it also has many limitations.
1. QuickTime Player cannot record the microphone and system sound at the same time.
2. The resolution, frame rate, video quality, and other recording options cannot be changed.
3. It cannot record the screen and display the camera picture-in-picture simultaneously.
4. The duration of the recording cannot be specified.
Use Omi Screen Recorder to record the screen on Mac.
After trying many screens recording Apps on Mac, I finally found A free and easy-to-use screen recording App on the Mac App Store - Omi Screen Recorder. Then I will briefly introduce the tutorial of Omi Screen Recorder.
The First use of the Omi Screen Recorder
After installing the omi screen recorder, an authorization window will pop up the first time you open the APP, requesting permission to record the screen, microphone, and camera. It is recommended to allow all of these permissions here. Of course, if these permissions are not allowed here, an authorization window will pop up again when you start recording later.
The main menu of the Omi Screen Recorder
After the App is launched, you will find that there is no main interface. Don’t worry. Click on the Omi Screen Recorder icon on the status bar to show the main menu.
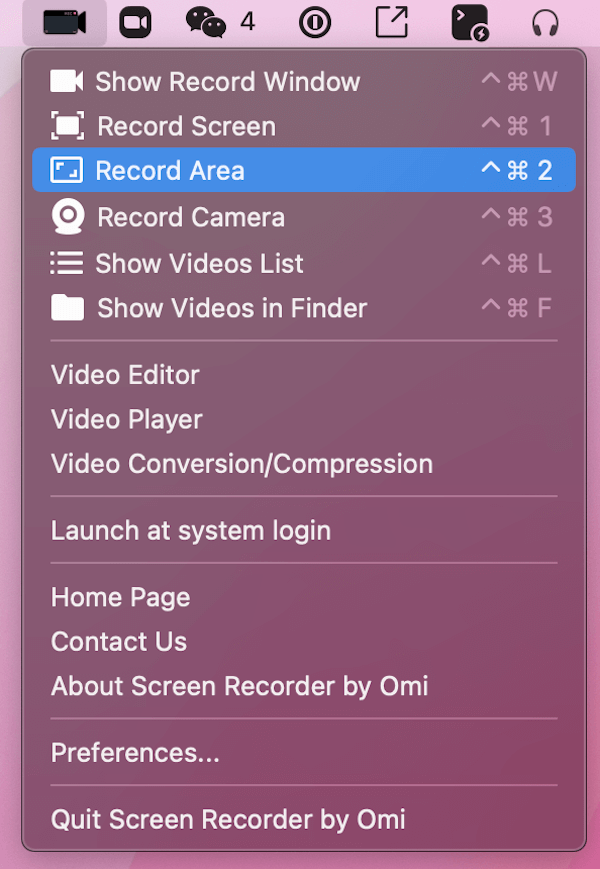
1. Show the recording window to select the screen recording mode (default global shortcut key: ctrl + ⌘ + W)
2. Record the entire screen (default global shortcut key: Ctrl + ⌘ + 1)
3. Record the selected area (default global shortcut key: Ctrl + ⌘ + 2)
4. Record the camera image (default global shortcut key: Ctrl + ⌘ + 3)
5. Show the list of recorded videos (default global shortcut key: Ctrl + ⌘ + L)
6. Show the directory where the recorded video is located (default global shortcut key: Ctrl + ⌘ + F)
7. Video editor
8. Video player
9. Video conversion and compression
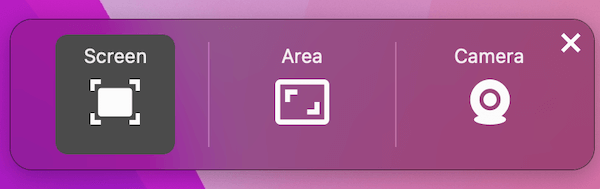
Show the recording window.
The recording window mainly includes three screen recording modes: full-screen, area, and camera recording. You can use the Tab key or the left and right keys to switch, the Enter key to confirm, and the ESC key to exit.
Full-screen recording and area recording
Both full-screen recording and area recording are essentially screen recordings. The entire screen will be selected by default if you choose full-screen recording. If there are multiple screens during the screen recording, you can place the mouse on the screen you want to record to switch the recorded screen, which is very convenient and intuitive.
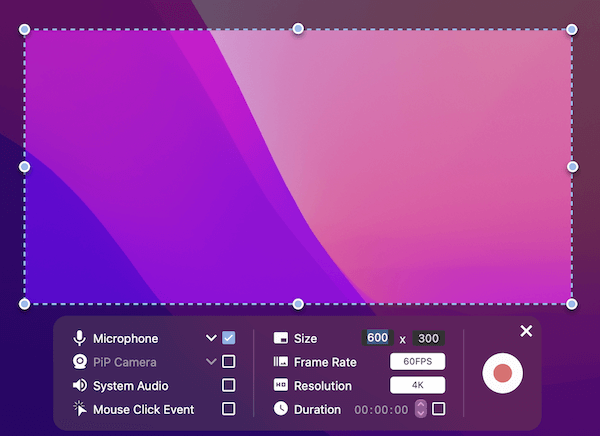
Screen recording options
Before screen recording, you can configure it through the recording options panel at the bottom. The main options are:
Recording microphone
Record picture-in-picture camera
Record system sound (enable the recording system sound feature requires a plug-in, you can download the plug-in directly in the pop-up window or manually install the Omi Screen Recorder Audio Driver.
Record mouse-click events
Image size, frame rate (15fps-60fps), resolution (720P, 1080P, 4K)
Recording Duration
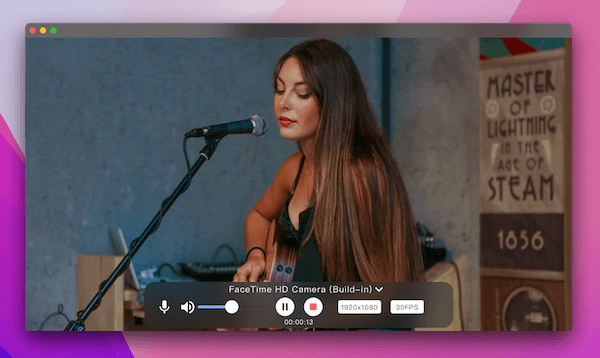
Camera recording
Omi Screen Recorder directly supports camera recording if your Mac computer has a FaceTime camera or an external USB camera. The camera recording options panel at the bottom supports changing cameras, changing the microphone device, adjusting the microphone volume, and adjusting the image resolution and the recording frame rate.
Start recording, pause recording, and end recording
Click the red circle button on the recording options panel to start recording directly (default shortcut key Ctrl + ⌘ + R) in screen recording and camera recording mode. The system's status bar will display the pause/resume button, the stop button, and the recording duration information. Click Pause/Resume to pause and resume recording (default shortcut key Ctrl + ⌘ + P). Click the stop button to end recording and save the recorded video (default shortcut key Ctrl + ⌘ + T)

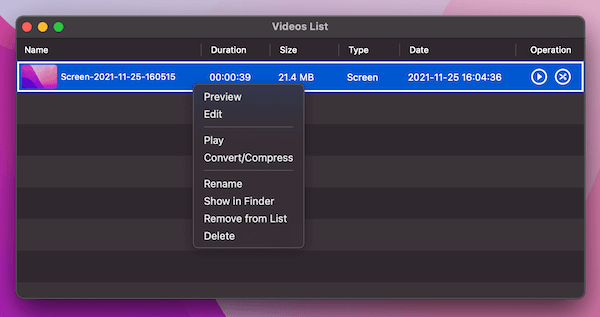
List of recorded videos
The recorded video list (default shortcut key Ctrl + ⌘ + L) will be opened after the recording is completed, and all the recorded videos will be displayed in a table. You can sort the videos by name, duration, file size, type, and creation time. Right-click on a video to open the operation menu, which supports operations such as preview, edit, play, convert/ compress, rename, show in Finder, remove from the list, and delete.
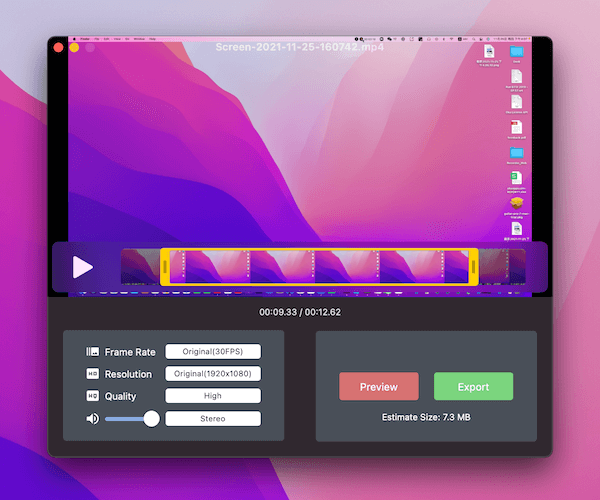
Video editor
You can directly open the video editing window in the main menu or the list of recorded videos. Then you can trim the video, modify the video resolution, frame rate, image quality, volume, etc. After the modification, you can preview it to confirm the modified video. If there is no problem, you can directly export the video. The exported video is the most compatible mp4 format, x264 video encoding, and AAC audio encoding.
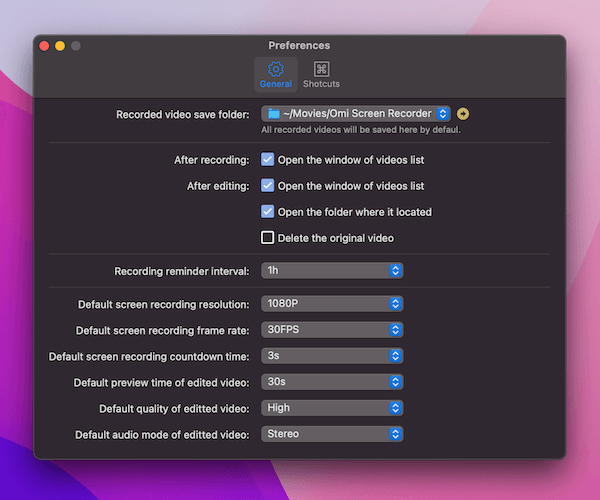
Preferences
Omi Screen Recorder also provides two types of preferences. One is general settings, and the other is shortcut keys settings.
The general settings contain many configuration options, including the recorded video save directory, the behavior after the video is recorded/edited, the recording time reminder, and multiple recording options.
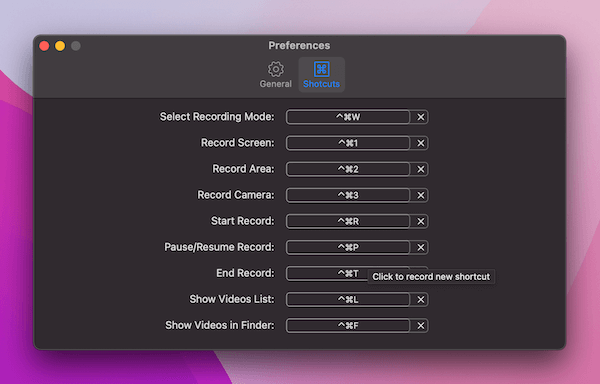
The shortcut key settings allow you to modify the global shortcut keys to conform to your usage habits and avoid conflicts with other apps' shortcut keys.
Summary of Omi Screen Recorder
The Omi screen recorder has rich features, beautiful UI, excellent interaction, and fantastic screen recording quality. OMI Screen recorder is the best free screen recording app on Mac I have used so far, and I strongly recommend everyone who has screen recording needs to try it.