
100% Make your NTFS disk/SD card read and write on Mac
Most Windows Systems use the NTFS format. So you will encounter a problem when you use your disk/SD card on your Mac: The Mac system does not natively support read and write mode for NTFS file systems, meaning you can read the disk but can not write data to it.
Many people take a cursory look and come to our customer service to say why it doesn't work; this is hard to answer. If you have a similar problem, follow the following steps to solve it. If you follow the steps carefully but fail, you can contact our customer service and provide more information.
1. First, remove all interfering factors, delete all the NTFS software you installed, and do not rush to install more NTFS software; you can ensure you've exited or uninstalled all NTFS software.
2. Restart the Mac. Why do you have to restart the Mac? Remember that rebooting solves 90% of electronic device failures. The first method from any professional encounters a problem must be to reboot.

After restarting your Mac, remember not to open any NTFS software; first, check if your disk appears in the system Finder; if your disk appears after restarting, congratulations, your disk connects to the computer with no problem. You can jump to step 9.

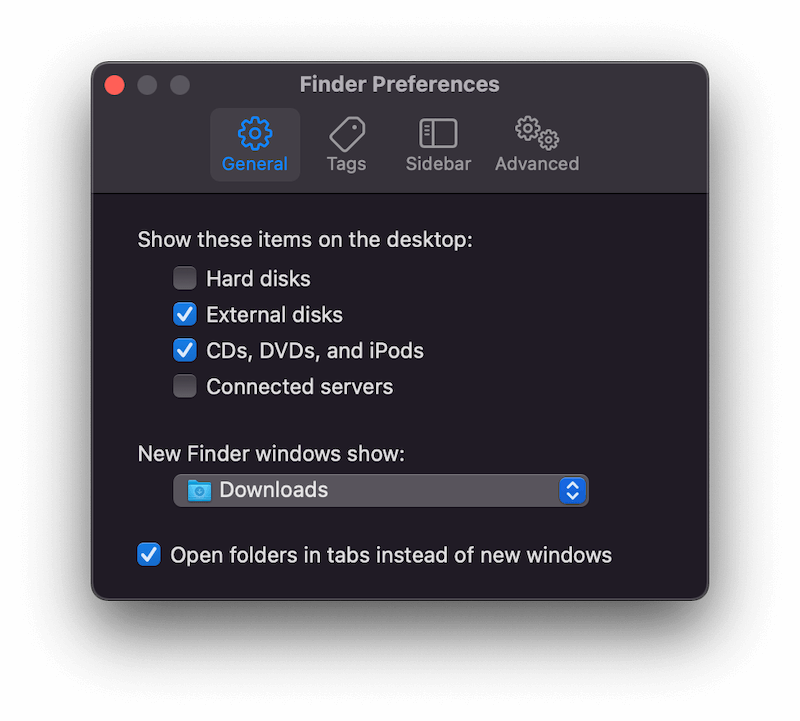
3. Make sure that you have enabled the display of external disks. If the first two steps fail, it could be that the connection is good, and it is just not shown in your Finder. So in this step, you can confirm that you have enabled the display of External hard disks. Open Finder, go to Finder's preferences and ensure you've checked the 'External disks' option. Note that one is general, and the other is sidebar settings.
4. Hardware Inspection: If you still cannot see your mobile hard disk or SD card in your Finder after step 3, you need to check the hardware from this step. You can check the following steps:
4.1 Restart your Mac and re-insert your disk carefully; try another port if it still doesn't work. If you see your disk in the Finder, congratulations, your disk is connected to the computer without any problem. Now you can jump to step 9.
4.2 Ensure the external hard drive has a good power supply; Usually, you can supply power to the portable hard disk after you plug in the USB. Still, some portable hard disks require an additional power supply, especially Seagate, Western Digital, or some other 3.5-inch portable hard drives. You may need to find out if there was a matching power cable when you bought the portable hard drive.
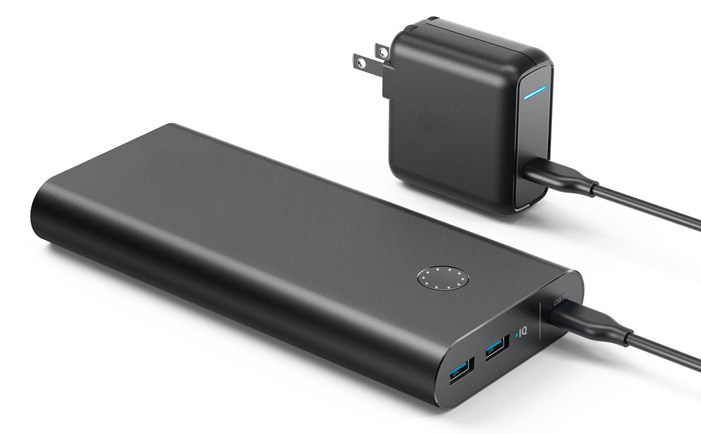
If you don't need extra power, but your USB socket is dusty or has poor contact, there may be an insufficient power supply, making it impossible to connect. Also, remember: it is impossible to chain multiple adapters. In addition, don't buy a copycat adapter; it's best to purchase official products from Apple; if you want a cheaper adapter, UGREEN's is also a good choice.
Also, for your Mac computer, primarily if you use a MacBook, MacBook Air, or MacBook Pro. Plug the Mac with a power supply. Ensure the computer is not working in low battery mode; This will also affect the connectivity of the removable external disk.
Well, at step 4, if there is still no response, you probably need to find professional hardware maintenance personnel to solve it but don't worry, we can continue to look at step 5 to see if there is any software in the system. There is a problem with the settings.
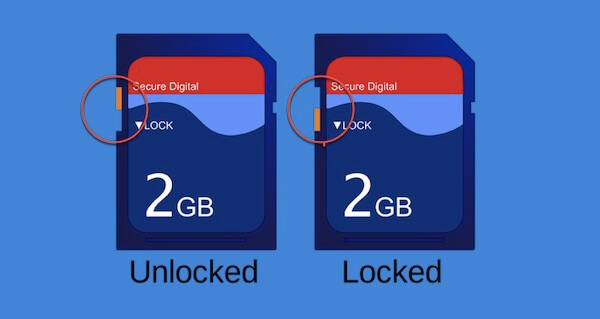
4.3 If you are using an SD card, there is a small thing that you must pay attention to the SD card. Some SD cards have a locked switch; you must turn this switch off.
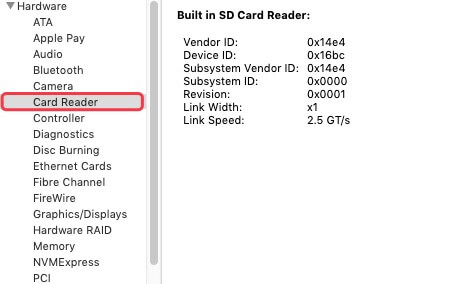
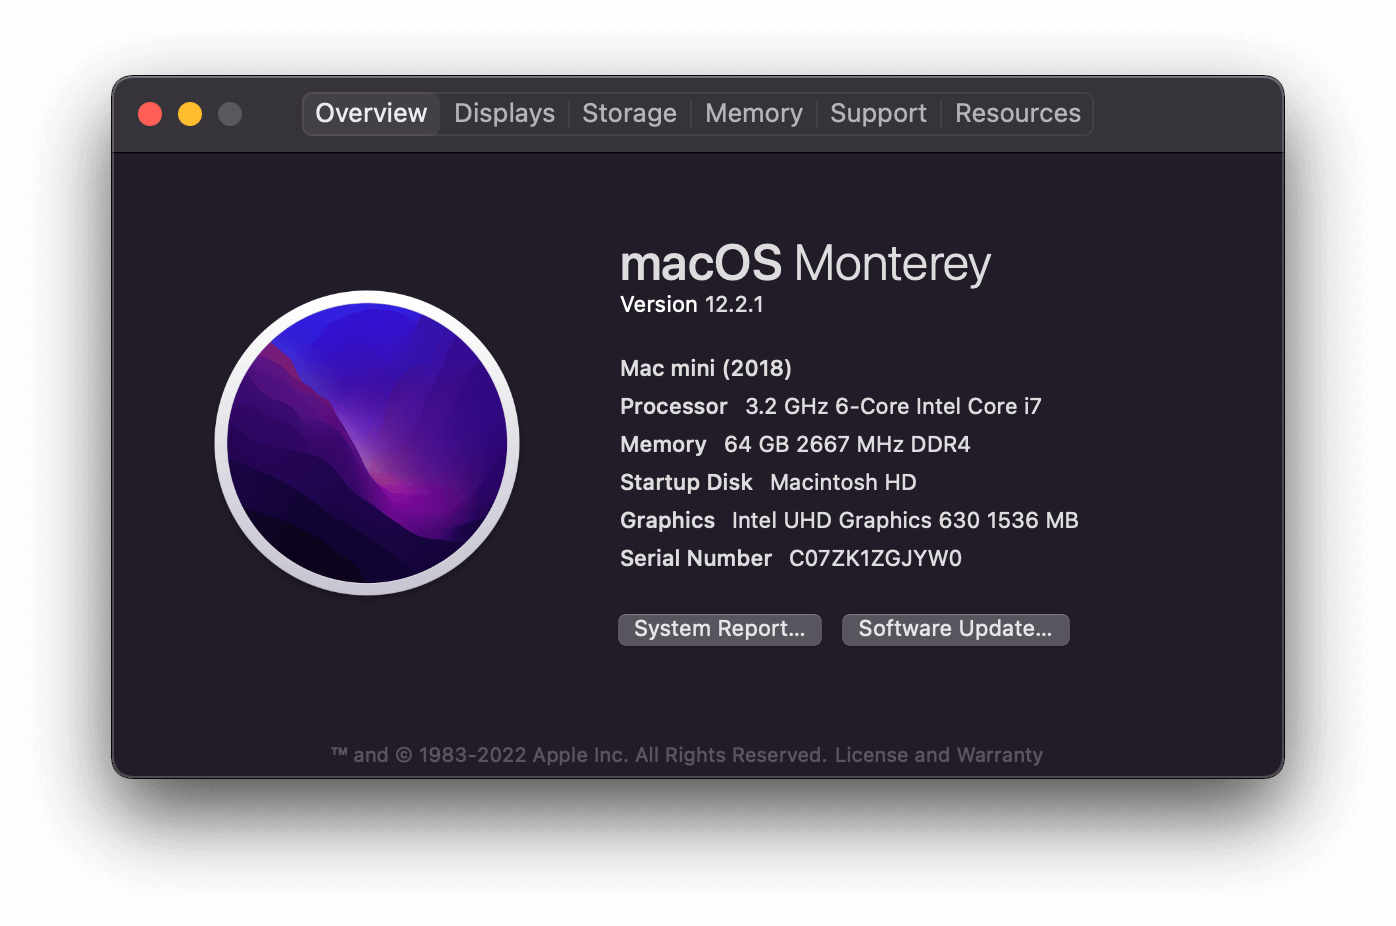
4.4 The latest MacBook, MacBook Pro, MacBook Air, and Mac Mini are not shipped with SD card slots. If you connect with a card reader, check whether the card reader supports Mac. One way to check is to click the Apple icon in the upper left corner of the Mac -> About This Mac -> Overview -> System Report -> Hardware -> Card Reader; if you can see all kinds of data by clicking on it, then there is no problem. You can give up and buy a new card reader if you can't see the card reader in the System Hardware report. Consider purchasing accessories from Apple's official website.
5. System Setting: Although it is a software level, we recommend non-professionals find a professional to accompany them while checking. Otherwise, it will be easy to mess up.
5.1 Upgrade the system to the latest version, especially make sure that the system is not macOS Monterey 12.0 or 12.0.1. These two Monterey systems have some problems, causing the mobile hard disk to fail to load.
5.2 Check the status of the external disk through the Disk Utility App to see if there is any chance to save it. Open Finder -> Applications -> Utilities to find Disk Utility
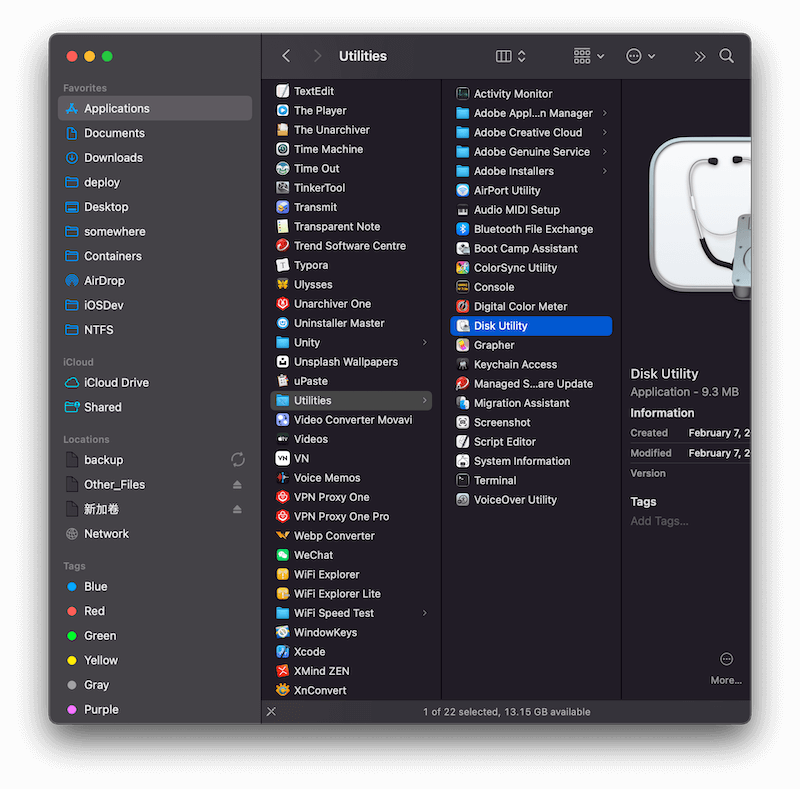
After opening Disk Utility, you will see all the disks on your system. There may be two situations. One is that you cannot see your disk in Disk Utility. If this is the case, go to step 6 to continue. If you can see your disk in Disk Utility, but it is not loaded, you can jump to step 7 to continue.
6. If you can't see your disk in Disk Utility, you can try the following to force Disk Utility to load the disk.
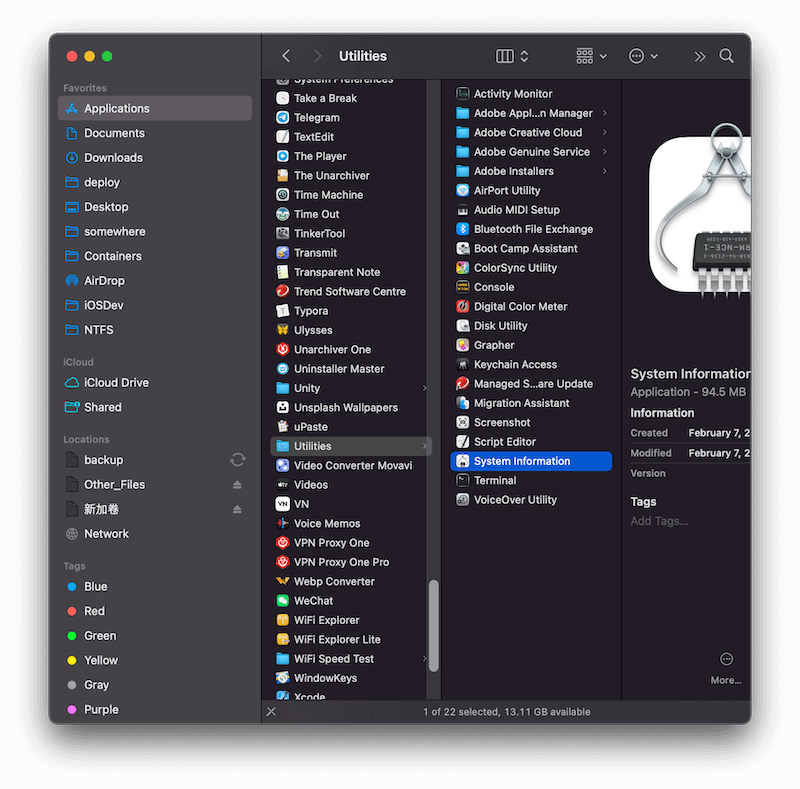
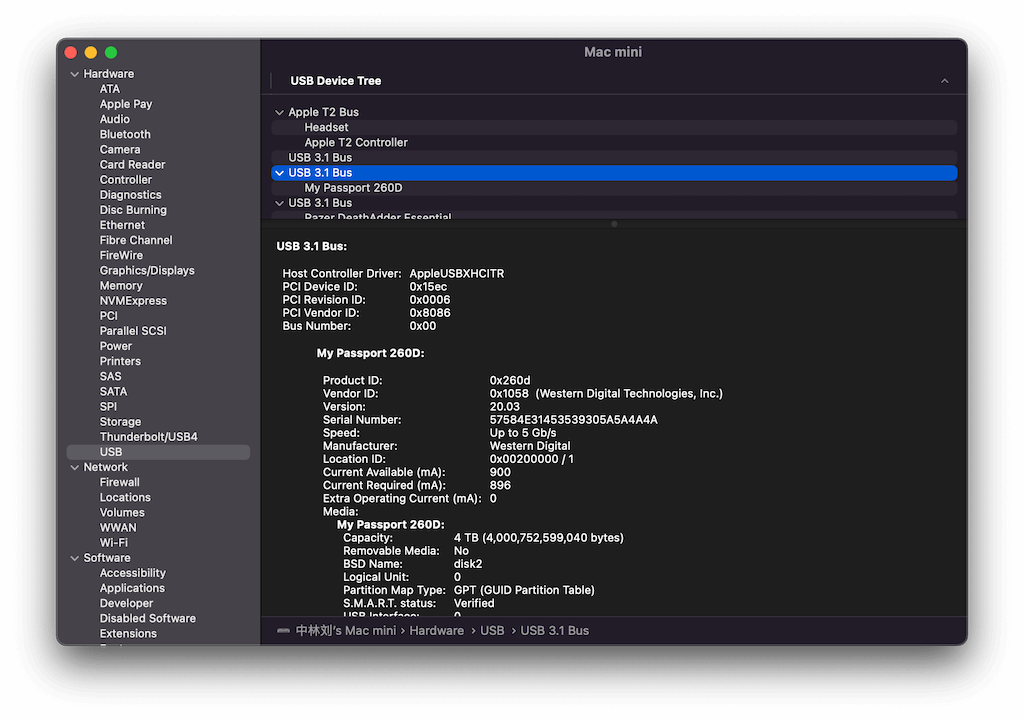
6.1 First, check whether there is information about the corresponding external disk in the System Information app. If you cannot see your disks, open the Activity Monitor in the system, open it and find a process called "fsck_xxx" click Force Quit in the menu bar, and then you may see your disk in the Finder. If you can see your disk in the Finder, then congratulations, your disk is connected to the computer without problems. Now you can jump to step 9.
6.2 If 6.1 fails, you can try resetting the system's NVRAM and SMC. These are things that save hardware information when the system is powered off. Sometimes resetting this can also solve the problem. But the method is more complicated; you can try it.
6.2.1 Reset NVRAM
Restart your Mac -> Immediately press and hold Command + Option + P + R for at least 20 seconds. -> Release when you hear a beeping sound. You can see your disk in the Finder of the system. Congratulations, your disk is connected to the computer without any problem. You can jump to step 9. If not, keep reading.
6.2.2 Reset SMC
There are many ways to reset the SMC, which sometimes change with the launch of new Macs. If the following methods do not work, you can try searching for methods to reset the Mac SMC.
If you have a MacBook Air MacBook Pro follow the steps below:
Shut down -> connect the power cable of the notebook -> then press and hold Shift + Control + Option and the computer's power button simultaneously for at least 10 seconds -> release it, then press the power button. If you see your disk in the Finder of the system after startup, congratulations, you can jump to step 9. If not, keep reading.
7. If you can see your disk in Disk Utility, but it is not mounted, this is better than the problem encountered in step 6. Select the external disk you want to mount, right-click, or click mount in the top menu. All right. If this step fails, it is hopeless. You can click 'First Aid' in the menu, but this risks losing files, so don't try it casually. Do it only when you can find a machine to read your portable hard drive and have backed up the files. If this 'First Aid' step fails, it is 90% hopeless.

8. The last step is to check whether any third-party app is interfering with the loading, you need to enter the macOS safe mode, and non-professionals should not try it. If you have recently installed any suspicious software, such as antivirus software, you can enter the safe mode and try again. Here's how to enter Safe Mode:
If it is an Intel chip, after the Mac is powered off, wait 10 seconds, hold down the start button, and hold down the Shift key simultaneously until you see the startup screen.
If it is a silicon M1 chip, after shutting down, wait for 10 seconds, hold down the power button, and do not move. Press and hold the Shift key at the same time. Click continue until you see the boot screen.
However, there may be new ways to start safe mode with new Macs, so we recommend that you search for the latest method to enter safe mode.
If your disk appears in safe mode, some third-party software must block your disk from loading. You can look for it carefully and uninstall it.
9. If you have tried the above methods and then successfully entered this step, your disk connection is no problem; it can appear in the Finder, a few steps away from the final success; now, you can install a third-party NTFS tool La. Please continue with the steps below.
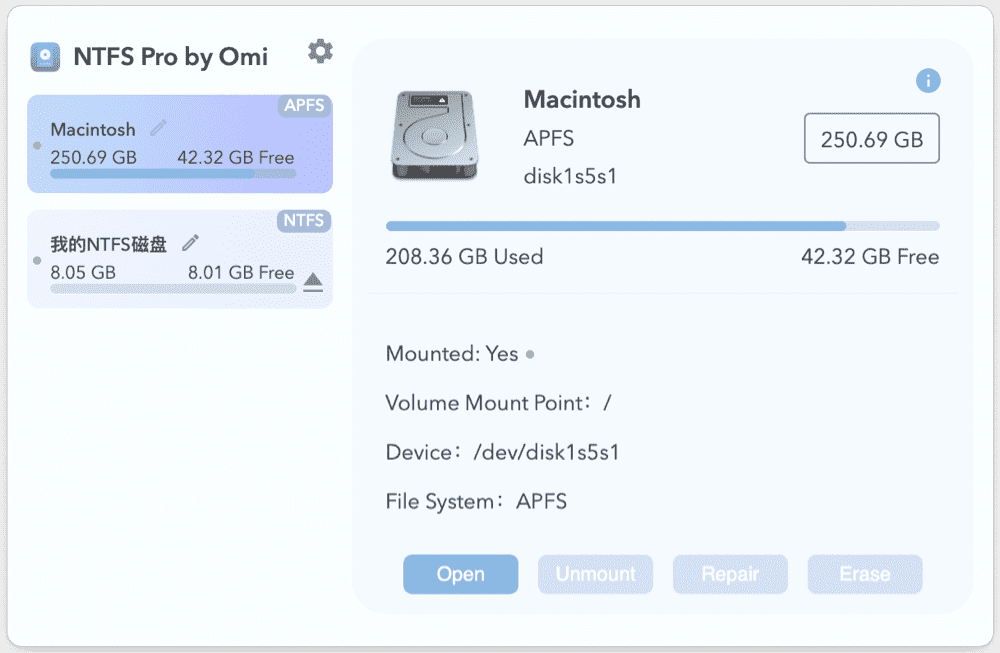
10. The free NTFS tool in the Mac App Store, NTFS Disk by Omi. Download from Mac App Store, and you need to install a helper Omi Helper. You need to enter the login password of the Mac computer during the plug-in installation process, restart the Mac after installation, open it again, and you can use it.
But note that when using this tool, you can only open your disk through the Open Disk button in the app and cannot see the disk in Finder directly. There are certain limitations, but it does not affect the use.
Of course, if this app does not work on your computer, you can try the way in step 11.
11. Download the pro version on the website, Omi NTFS Disk Pro. This app comes from the same developer as step 10, but the method used is indeed different, so if step 10 fails, you can try the Pro version again at this step. But the installation steps are slightly more complicated. Here are the installation steps. Restart your This pro version has better compatibility and fewer limitations. If it still fails, there is no other good way.
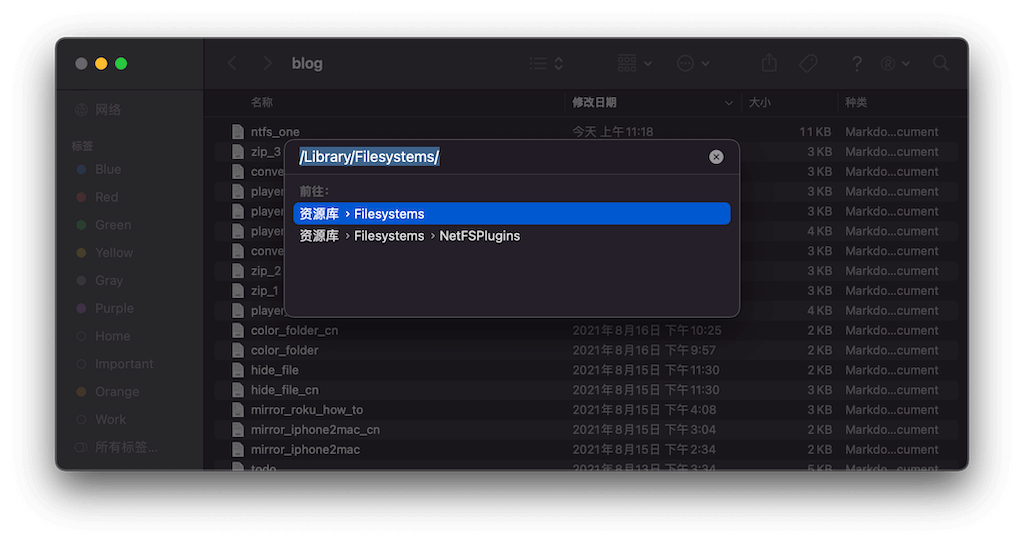
There can only be one NTFS app simultaneously. If you install one, you must uninstall the other one. And usually, the uninstaller will have residual driver files in the /Library/Filesystems/ directory. If you encounter an error saying that you need to uninstall other NTFS software, you can delete the files in this directory and reinstall them.
12. Finally, If the previous steps have not solved the issue, there is a last resort that can enable the NTFS to read and write without any tools. This method is similar to step 10, except you must manually enter a command in the terminal app. If step 10 fails, you have succeeded here. You can continue to revise and improve the procedure of step 10. Remember to contact my email support@7littlemen.com. Proceed as follows:
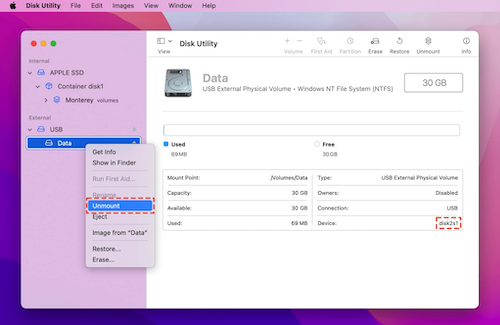
12.1 Open Disk Utility located in the Utilities folder in the Application
12.2 Right Click on your USB Drive and select "Unmount"
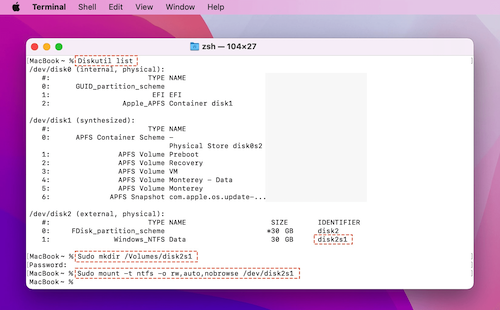
12.3 Open Terminal located in the Utilities folder in the Application In this Terminal Console, input the below commands (Remember to replace the "disk2s1" section with the identifier of your NTFS drive):
diskutil list
sudo mkdir /Volumes/disk2s1
sudo mount -t ntfs -o rw,auto,nobrowse /dev/disk2s1 /Volumes/disk2s1
When using these commands, you might need to input your Mac login or admin password. And after that, you still can not find your disk in your Finder. But you can open the Finder, press cmd + shift + G, Go to Folder, and type "/Volumes" in the search box, then you will find your disk.
13. Finally, if the above methods still do not work, you can only use the last resort, back up the files on your disk and reformat the disk. Omi NTFS Disk Pro also supports formatting or using the built-in disk. Disk Utilities also work. If you don't need to exchange files with a Windows computer, use Apple's latest APFS file system. If you still need to exchange files with windows, consider formatting your disk to exFAT
At this point, 90% of the cases should have been resolved. If not, give up and find the professionals around you.